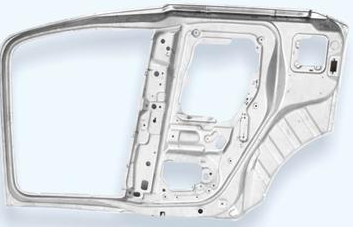
In the production process of automobile sheet metal parts, there are certain requirements for stamping technology and stamping die. In high-speed stamping equipment and multi-function stamping die, only "high-speed" and "multi-function" can not meet the production requirements, only to achieve continuous conveying of sheet metal to stamping machine and stamping die, and stamped sheet metal workpiece can be removed from the stamping die and conveyed to the next stamping worker in a very short time. In order to realize the economic benefits of the theory, we should pay more attention to the time. Therefore, the correct stamping process should be: careful analysis and research of the whole stamping process of sheet metal parts, to ensure that the whole process from the beginning of sheet metal feeding to the completion of sheet metal parts processing, has the expected shortest production rhythm, so as to achieve the best efficiency.

1. Clearance treatment
In steel and copper sheets, the corrosion, dirt and oxide scales of their outer layers will affect the sheets, and cracks, pore and so on may occur. So we have to do shape cleaning before connecting. Generally speaking, we can use pickling method and mechanical method to deal with it.
2. Softening treatment
In fact, he is to eliminate the residual stress during work hardening and production, so that it can be restored to its original plasticity, so we need to soften. Generally speaking, according to the requirements of softening, we can be divided into isothermal annealing, full annealing, stress annealing and recrystallization annealing.
1. Auto sheet metal parts should be developed in a suitable way, so as to save materials and processability conveniently.
2. Question gap and edge-wrapping method should be reasonably selected for automobile sheet metal parts. T = 0.2 below 2.0, T = 0.5 between 2 and 3. Long edge and short edge (door panel type) should be adopted for edge-wrapping.
3. Automobile sheet metal parts should reasonably consider tolerance shape size: negative difference goes to the end, positive difference goes half; hole size: positive difference goes to the end, negative difference goes half;
4. Burr direction;
5. Check material, plate thickness, tolerance of plate thickness;
6. Draw a sectional view in the direction of tooth extraction, riveting, tearing, punching and convex points (bags).
7. Emphasis should be given to the places where mistakes are prone (similar asymmetry);
8. For special angle, the inner radius of bending angle (generally r = 0.5) shall be unfolded by trial bending;
9. Enlarged maps should be added to places with larger sizes.
10. The place to be protected by spraying should be indicated.
Copyright By © Jiangsu Halreal Vehicle Industry Co., Ltd. Powered by Yicheng Network