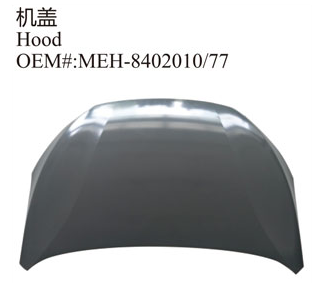
Rockwell hardness tester is used for hardness test of hardware stamping parts. Small stamping parts with complex shape can be used to test the small plane, which can not be tested on ordinary Rockwell hardness tester.
Metal stamping processing includes stamping, bending, drawing, forming, finishing and other processes. The processing materials of stamping parts are mainly hot-rolled or cold-rolled (mainly cold-rolled) metal plate and strip materials, such as carbon steel plate, alloy steel plate, spring steel plate, galvanized plate, tinplate, stainless steel plate, copper and copper alloy plate, aluminum and aluminum alloy plate, etc.
PHP series portable surface Rockwell hardness tester is very suitable for testing the hardness of these stamping parts. Alloy stamping parts are commonly used in the field of metal processing and mechanical manufacturing. Stamping parts processing is a processing method that uses die to separate or form metal strip. Its application range is very wide.

The main purpose of hardness testing of metal stamping parts is to determine whether the annealing degree of the purchased metal sheet is suitable for the stamping parts processing to be carried out later. Different kinds of stamping parts processing technologies need different hardness levels of plates. The aluminum alloy plate used for stamping can be tested with a Vickers hardness tester. When the thickness of the material is greater than 13mm, the Vickers hardness tester can be used instead. The Vickers hardness tester shall be used for pure aluminum plate or low hardness aluminum alloy plate.
In the automotive stamping industry, stamping is sometimes called sheet forming, but there are some differences. The so-called sheet forming refers to the forming method of plastic processing with sheet, thin-walled tube, thin profile, etc. as raw materials. At this time, the deformation in the direction of thick plate is generally not considered.
How to test the quality of a stamping part:
1、 Touch test.
Wipe the surface of the outer cover with clean gauze. The inspector needs to wear touch gloves to touch the surface of the stamping along the longitudinal direction of the stamping part. This inspection method depends on the experience of the inspector. If necessary, the suspected area can be polished with oilstone and verified, but this method is an effective and rapid test method.
2、 Oilstone grinding.
1. First, clean the surface of the outer covering with clean gauze, then polish with oilstone (20 × 20 × 100mm or larger), and polish the arc and hard to reach places with relatively small oilstone (for example: 8 × 100mm semicircle oilstone)
2. The choice of the size of the oilstone depends on the surface condition (such as roughness, galvanizing, etc.). It is recommended to use fine-grained oilstone. The polishing direction of the oilstone is basically along the longitudinal direction, and it fits the surface of the stamping part well. Some special places can also be supplemented with the horizontal grinding.
3、 Flexible mesh grinding.
Wipe the surface of the outer cover with clean gauze. The surface of stamping parts shall be grinded longitudinally to the whole surface with flexible sand mesh, and any pitting and indentation can be easily found.
4、 Oiling inspection.
Wipe the surface of the outer cover with clean gauze. Then apply oil evenly along the same direction with a clean brush to the whole outer surface of the stamping part. Put the oiled stamping parts under strong light for inspection. It is recommended to erect the stamping parts on the body position. With this method, it is easy to find the tiny pits, hollows and corrugations on stamping parts.
5、 Visual inspection.
Visual inspection is mainly used to find out the abnormal appearance and macro defects of stamping parts.
6、 Inspection tools.
Put the stamping parts into the inspection tool, and test the stamping parts according to the operation requirements of the inspection tool instructions.
Copyright By © Jiangsu Halreal Vehicle Industry Co., Ltd. Powered by Yicheng Network